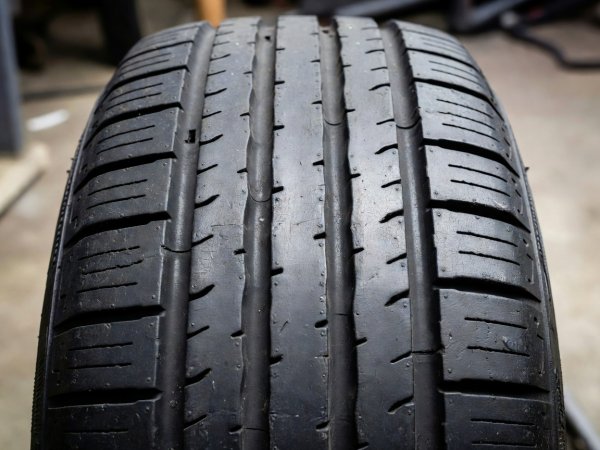
Workshop Inspection Log • Tread Geometry • Groove Depth • Wear Pattern Clues Turn steering to full lock to inspect inner shoulder ribs
Contact Patch Architecture

Read the Contact Surface

Tread grooves, ribs, shoulder blocks, and sipes do two jobs at once: they pump standing water out from under the wheel while bracing the rubber against cornering and braking forces. Knowing which pattern is fitted tells you how the wheel must be mounted and rotated.

Three Core Tread Architectures

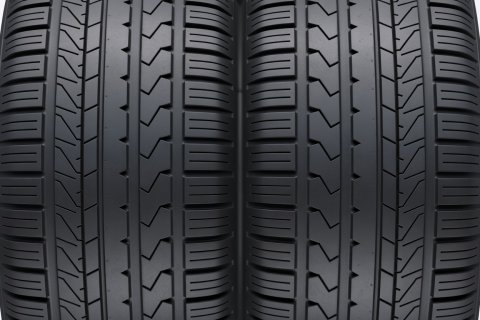
Soft-lit 3D render of a symmetric tyre tread block pattern with continuous ribs 01 • Symmetric

Continuous Rib & Block

Both halves of the tread face mirror each other across the centre line. Commonly fitted to compact city cars, light commercial vans, and touring models prioritizing low rolling resistance and quiet running.

WorkshopMounting Rule: Can be mounted either way round on the rim and rotated freely across axles or diagonally.
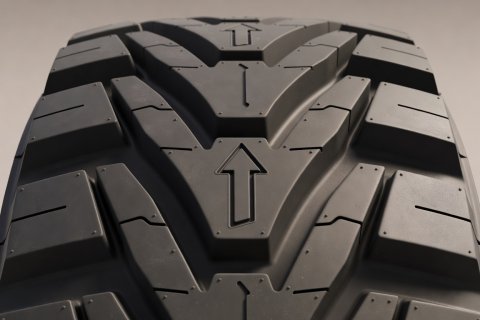
Soft-lit 3D render of a directional V-groove tyre tread pattern with rotation arrow 02 • Directional

V-Shaped Water & Slush Channels

Lateral grooves converge toward the centre in an arrowhead layout. As the wheel rolls forward, water and slush are forced outward from the centre rib toward both shoulders, giving strong hydroplaning and snow traction.

Workshop Mounting Rule: Check the sidewall ROTATION → arrow. Must only rotate front-to-back on the same side of the car unless dismounted from the rim.

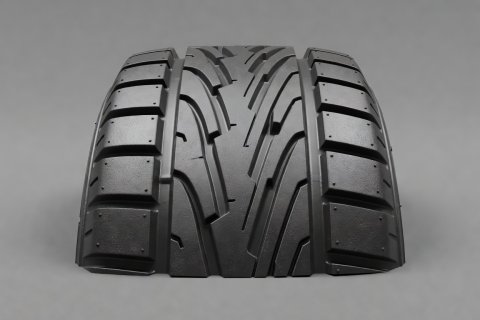
Soft-lit 3D render of an asymmetric tyre tread showing wide outer blocks and inner wet channels 03 • Asymmetric

Dual-Zone Inner & Outer Face

The inner tread half features high groove void ratios to disperse water, while the outer shoulder uses wide, stiff rubber blocks to resist lateral flexing when weight transfers outward during cornering.

Workshop Mounting Rule: Verify that the OUTSIDE stamp faces the kerb on all four wheels. If "INSIDE" is visible on the outer face, the tyre is mounted incorrectly.

Supporting close-up photograph showing real tyre tread wear patterns across shoulder and centre ribs
Visual Inspection Log

Observing Wear Patterns Across the Width

Real-world wear photographs help illustrate what uneven contact looks like, though an image alone is never a substitute for a physical workshop measurement. Always measure depth in at least three grooves across the tread width at several points around the circumference.

  • Even Wear Across All RibsHealthy inflation and suspension geometry
  • Heavy Inner Edge ScrubbingOften linked to excessive negative camber or worn wishbone bushes
  • Feathering (Sharp Rib Edges)Run your palm flat across the tread; sharp edges point to toe misalignment
  • Cupping / ScallopingHigh-and-low patches around the circumference; inspect shock absorbers and wheel balance
  • Flat Spot in One PatchEmergency lock-up skid or prolonged stationary parking under load

Depth Thresholds and Wet Stopping Margins

Under UK road traffic law and European UNECE Regulation 30, passenger car tyres require a minimum tread depth of 1.6 mm in a continuous band throughout the central three-quarters of the tread width and around the entire outer circumference. Driving below this limit carries severe penalties per defective tyre and invalidates motor insurance policies if involved in a collision.

From an engineering standpoint, tread performance does not stay flat down to 1.6 mm and then suddenly drop off. Instead, water-clearing capacity degrades progressively once grooves pass below 3.0 mm on summer tyres and 4.0 mm on winter tyres (where deep snow-trapping pockets and full-depth sipes are critical). When checking with a calibrated digital or Vernier depth gauge, place the probe on the flat base of the main circumferential groove—not on top of the raised Tread Wear Indicator bridge—and record the lowest figure found on the tyre.

Next: Check Before the Journey